How to Glaze a Christmas Ham
 HAMS MUST APPEAR FIRM AND FEEL DRY
When at the store, “Insert a hatpin deep to the bone, and if there was an ounce of moisture on the pin, look for another.” would say the late Isabella Beaton renowned for her Book of Household Management first published in 1861.
This approach will get you kicked out of the store nowadays, so look for a ham with a firm constitution. “Wobbly hams are no good, because a ham is a cooked cured product so it wants to be firm to the touch. If it’s not firm to the touch, don’t touch it!” says Kate King.
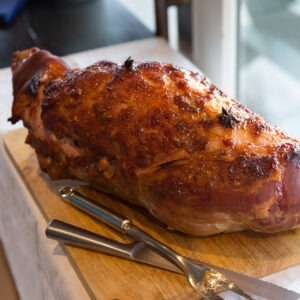
“The colour of the ham should be a rose wine, preferably free of bruising evidence or blemishes. It should have white fat under the cap. If it’s a cut ham you can look for any blemishes. It should look dry and shouldn’t have a lot of liquid in the bag with it. The cap should be a golden brown colour. If the colour looks unusally bright, it probably is! Oh and don’t try and stick your hatpin in to test it, you will get thrown out of the store!”
AVOID HIGH WATER HAM
Ham is a cured product so the more fluid around the bone the shorter it will last. Purply colour around the bone can mean the cure hasn’t gone all the way through, and as a matter of choice I would avoid it. Quality ham should hang while it cures, not sit in brine. Look for NZ ham around the 5–7% water mark with a traditional dry cure. Higher than that, wonder how much pump you’re consuming rather than natural product.
The flavour of the ham should be sweet and the texture should be firm and just moist, not overly dry. You may find a top end ham slightly drier until you get used to the fact that you can actually taste the meat and your mouth isn’t full of saline solution. The secret to a really good ham is as little water as possible left in the ham after the cure.

THE ULTIMATE HAM GLAZE
First things first. Get your ham first. Remember 5% less water. Take the ham out of the fridge for at least an hour before you put it in the oven.
Get the biggest dish you can find with a deep side that can accommodate your ham, whether it’s a big one or a small one. Get a grilling rack that fits into the dish or a roasting cradle – they’re good. Put it into the dish. Then you pop your ham into the cradle or onto the rack, it has to be a deep rack because you’re going to pour half a litre of water into the dish.
Pre heat the oven to 160, with the whole ham in there with the cap on for half an hour, then check it. 30 minutes skewer the ham all over leaving the cap on.
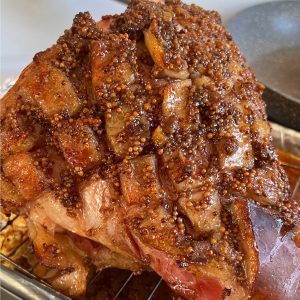
Return to oven for a further 15 – 20 minutes. If it’s a half ham then it will need less time. Then take ham out of the oven and remove the cap. Orange zest, cloves, cinammon, mustard or even grated ginger finish a ham beautifully. ‘To decorate the top, use slices of orange. This is when you can style it with cloves or put pineapple rings and glace cherries and invite Arthur from the 80’s!’ laughs Kate.
PUTTING THE GLAZE ON
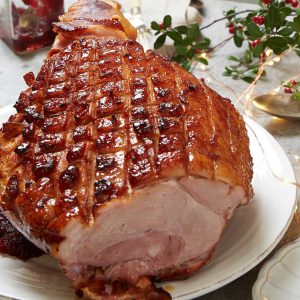
Use any of our Glaze recipes. See below. Paint it on, then put back in the oven, increase temp to 175 degrees and allow your ham to glaze for about 20 minutes.
The key to a good glaze is not too much honey or sweetener that will burn. Your recipe should be balanced enough to achieve a nice gloss.
You can eat your ham straight away as they are pre-cooked but go with the glaze to truly enjoy it.
Retain some of the glaze, warm through in a pot and serve on the side of the ham for extra flavour.
The perfect glaze needs some sugar component and to give you a caramelised finish. Brown sugar and/or honey make an ideal glaze for this.
 When shopping, you’ll see two types of ham.
1. Bone in ham, is well, has the bone left in.
2. Champagne ham is partially boned, leaving the knuckle in.
Shop for Free Range Whole Ham on the Bone
SEE VIDEO BELOW FOR HOW TO GLAZE YOUR HAM


